Portrait Retouching
Published on June 4, 2026 | Views: 279 | Category: Photoshop Tips
From Raw to Radiant: A Step-by-Step Guide to Portrait Retouching
Every great portrait starts as a raw file — natural, unfiltered, and honest. Between the camera shutter and the final published image lies a careful, deliberate retouching process that turns a good photo into a polished, confident portrait.
Here's a look at how a typical portrait retouch progresses, stage by stage, and what happens (and doesn't happen) at each step.
Stage 01 — The Raw Original
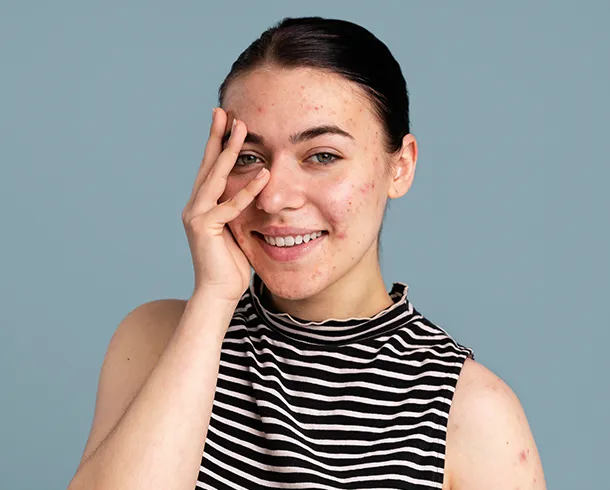
This is where every retouch begins: the unedited image. Skin may show breakouts, blemishes, or uneven texture — completely normal for a raw capture, even under good lighting.
Before any tool touches the image, a good retoucher maps out exactly what needs attention — individual spots, redness, texture issues — so the edit stays targeted instead of turning into a blanket smoothing filter.
The golden rule of professional retouching: never touch what doesn't need touching.
Stage 02 — Blemish & Spot Removal
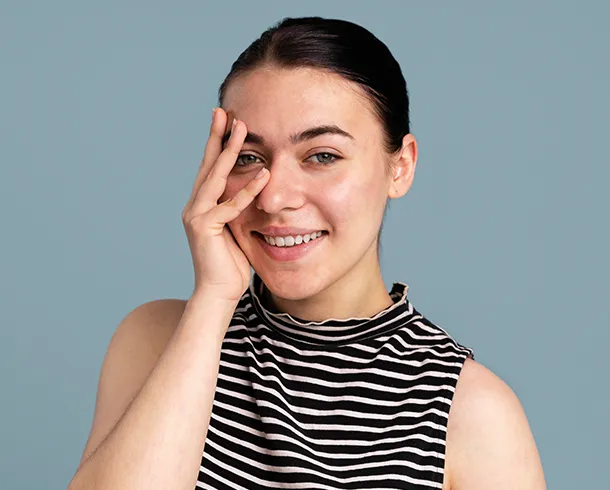
Individual blemishes and spots are removed one at a time, typically using healing and cloning tools, patched in with surrounding clean skin texture so corrections blend naturally rather than looking airbrushed.
At this stage, the skin should still look completely real — pores and natural texture stay intact. Only the tone has changed.
This is usually the most time-intensive part of the process. A face with several active spots can take dozens of individual corrections to get right — each one placed carefully to avoid the repetitive, patchy look that gives away cheap editing.
Stage 03 — Skin Smoothing & Tone Evening
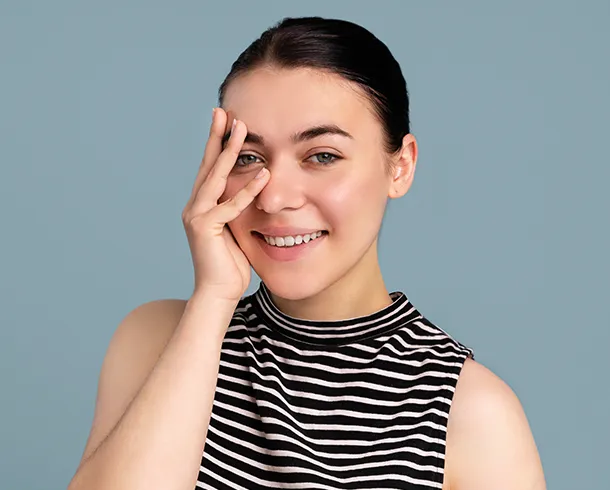
With individual spots handled, the focus shifts to overall tone. A common professional technique here is frequency separation, which splits the image into a color/tone layer and a texture layer that can be edited independently.
On the tone layer, uneven redness or blotchy discoloration is smoothed out. The texture layer is left alone, so pores and fine detail stay natural.
Done well, the result reads as healthy and even — not plastic or over-filtered.
Other adjustments that often happen at this stage: subtle dodge-and-burn for dimension, gentle eye brightening, and toning down any remaining redness.
Stage 04 — Final Polish & Enhancement
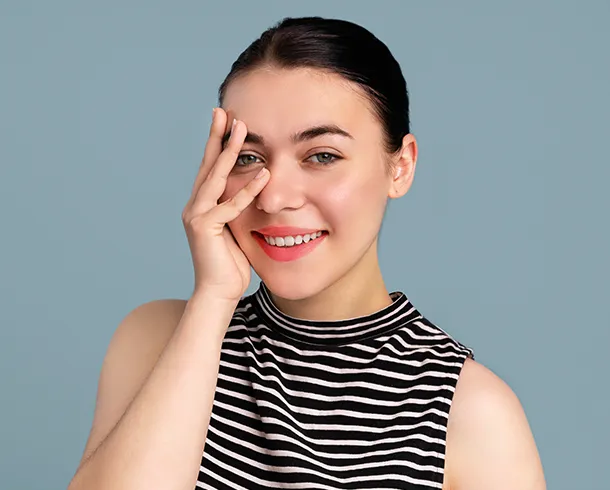
The last stage takes a clean portrait and adds finishing touches — sometimes a color grade, sometimes a digital makeup addition like a lip color, composited in and softened to sit naturally on the skin.
Digital makeup is especially useful for beauty brands, cosmetics campaigns, and e-commerce listings where a specific look needs to be shown without a full reshoot.
A final pass often includes teeth brightness refinement, catch-light enhancement in the eyes, and sharpening on the eyes and hair — the two areas viewers' attention is drawn to first.
The Goal of Retouching
Good retouching isn't about changing who someone is — it's about presenting a clean, well-lit, confident version of a single photographic moment. The subject should still be completely recognizable at every stage.
Ready to see what professional retouching can do for your portraits, product images, or brand photography? Get in touch to learn more about pricing and turnaround for your project.
Related Posts
 Read More
 Read More
